
The Basics of Repointing Brick | Ep. 173
[ad_1]

Repointing brick is the procedure of renewing the pointing, or external mortar joints, in among them. Above time, weather deteriorates the mortar, which could then induce water to leak inside of the brick wall.
Repointing a historic brick property requires a various variety of mortar so it will past for yrs to arrive.
Scott Evans in Rochester, Sick., has started repointing his 155-calendar year-outdated brick dwelling in Rochester, Unwell., but the mortar is popping out.
So, what’s the solution?
Scott’s dilemma has to do with the style of mortar he employed.
When repointing an more mature brick residence, you really do not want a mortar that will get rid of more challenging than the brick by itself.
More mature bricks are soft, and they have a tendency to increase and deal additional in temperature and humidity modifications than newer, tougher bricks.
Use sort O mortar — a significant-lime mortar with reduced compression energy. It consists of less Portland cement and a lot more lime, which makes it softer and also more waterproof.
Listed here are the fundamentals for repointing brick:
- Use a chisel or handheld grout observed to eliminate the mortar.
- Damp the bricks and allow them soak overnight. Maintaining them hydrated will avert the bricks from soaking up also a great deal of the h2o in the mortar combine.
- Future, blend the mortar. The common rule for mixing mortar is to use three pieces sand to 1 section mortar mix. Incorporate the mix with h2o right until it reaches the regularity of cake frosting. Function in compact batches so the mortar does not dry out before you apply it.
- Perform the mortar between the bricks utilizing a pointing trowel. Use the flat conclude of the trowel to scrape absent any excess on the confront of the brick.
- For the following 3 days, mist the mortar daily so it dries slowly but surely and will not crack.
Skip to [9:35] for the whole phase on the Today’s House owner Podcast.
Also on this episode:
Greatest New Product or service
 |
LG’s new convection oven with air fry capability saves on counter space and can cook for a group. Discover more>> |
Basic Answers
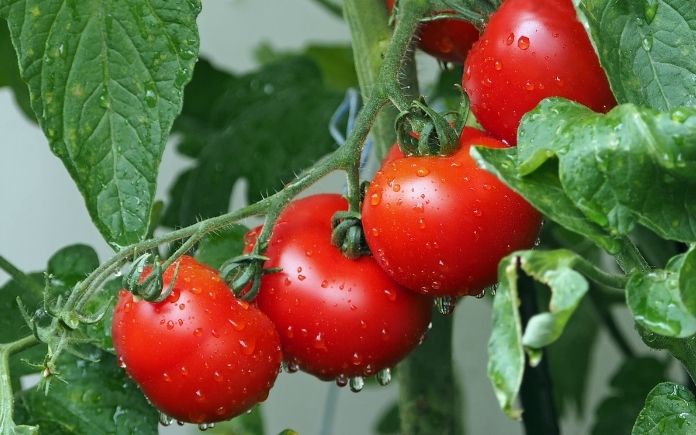
Epsom Salt in the Yard — Epsom salt is magnesium sulfate, which is loaded in minerals that plants want.
By including Epsom salt to your backyard garden, the crops will absorb a great deal a lot more nutrition from the soil and fertilizer.
In this article are a few ways to develop nutritious vegetation with Epsom salt:
1) Plants in the nightshade family members — tomatoes, peppers, eggplants, potatoes — have to have magnesium to generate bigger yields and much more flavorful fruits and vegetables. Sprinkle 1 tablespoon of Epsom salt close to the foundation of your vegetation. Or, combine the salt with a gallon of drinking water and drinking water the vegetation with the mixture. Repeat every two months.
2) Is your garden searching uninteresting? Include 3 kilos of Epsom salt for just about every 1,250 square toes of grass and then water your lawn.
3) Want robust roses? Sprinkle Epsom salt at the time of planting and when the flowers are in bloom. The salt encourages the rose bushes to deliver bigger bouquets with deeper shades.
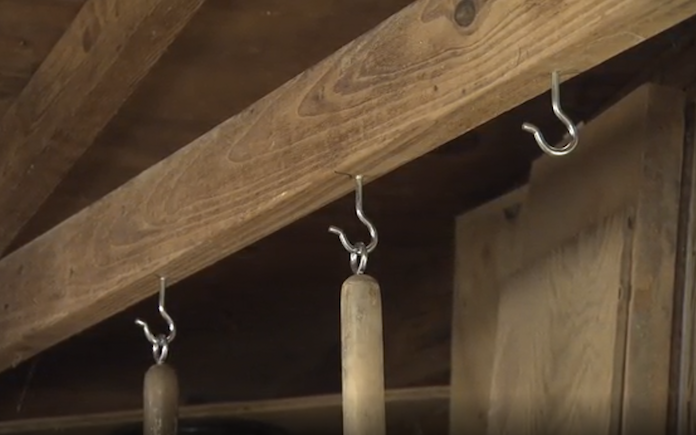
Storing Yard Instruments — Here’s an easy and effective way to keep extensive-taken care of backyard applications in a drop or garage:
- Drill a pilot hole in an overhead joist and twist in a screw hook.
- Then, drill a pilot hole in each and every stop of the tool’s handle, and twist in a screw eye.
Now you can basically suspend the equipment from the overhead hooks.
Watch: Idea for Storing Lawn and Backyard garden Resources
Dilemma of the Week
Q: I reside in north Georgia exactly where the soil is comprised pretty much totally of pink clay, so it’s virtually not possible to grow bouquets and greens in my gardens. I tried out tilling the soil and working with fertilizers, but absolutely nothing would seem to develop, besides weeds. Do you have any ideas?
A: Clay soil has very poor drainage and is compacted tightly, so roots won’t maintain very well.
Generally, tilling the clay soil and introducing a layer of topsoil is adequate for grass to develop. Nonetheless, for plants with deeper root devices, like vegetables and flowers, you will require to do a reasonable total of work to make that clay soil suitable.
1st, till the soil and aerate it as significantly as attainable. Then, sprinkle about an inch of expanded shale more than the soil.
Until the expanded shale into the clay soil, and then spread two to a few inches of compost around it.
Eventually, until the compost into the shale and clay soil mixture.
At the time your soil is prepped, make absolutely sure the pH is accurate for whatsoever plants you opt for.
Skip to [33:50] for the total section on the Today’s Home owner Podcast.
Other Items and Back links Outlined
Additional Looking through
Inquire a Issue! (Podcast)
Inquire a concern and we could solution it on the “Present-day Homeowner Podcast!” We also may well use it on our nationally syndicated radio broadcast or on todayshomeowner.com.
[ad_2]
Resource website link
.png)